Advanced Features
Twilio Integration
Core Plan Ultimate PlanThe Twilio Integration allows you to integrate with Twilio to send and receive SMS messages directly in CloudBridal. This has many advantages over our built-in messaging including removing the 150 character limit on SMS messages, the ability to receive images, allowing you to use automated SMS messaging functionality like appointment reminders and automated rules-based messaging, and enabling you to take advantage of Twilio native features like Bring Your Own Number, Call Forwarding, and more.
Alternatively, if you are based in the United Kingdom, you also have the option of using the Vonage integration instead of Twilio.
Contents
- Requirements
- Twilio Setup
- Additional Regulatory Requirements
- Vonage Setup - United Kingdom Only
- FAQs
Requirements
- You must be on the Core or Ultimate plan in order to enable SMS messaging.
- Register for a Twilio account.
- Add a payment method to your Twilio account, as Twilio charges for SMS messages sent and received. See regional pricing here.
- You must acquire a phone number in one of two ways:
- Your region may have additional regulatory requirements which require you to provide additional information to Twilio during the onboarding process. See the Additional Regulatory Requirements section below for more information.
Twilio Setup
- Be sure that you have completed the requirements above, and have also provided any regulatory information (see section below) required by Twilio.
- Log into your Twilio console, and copy your Account SID, Auth Token, and Phone Number. You will need these later.
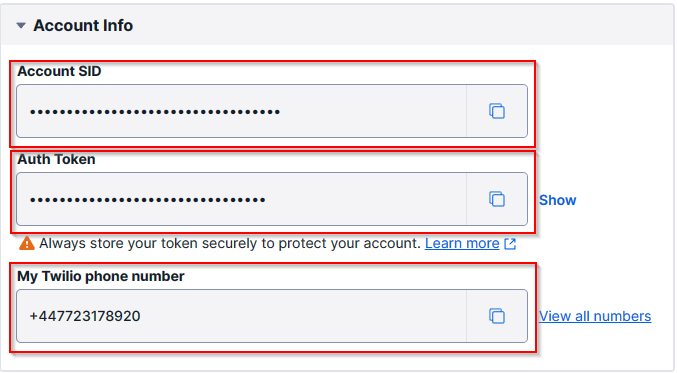
You will have unique values in these three fields that you need to copy.
- Navigate to Phone Numbers > Manage > Active numbers.
- Select your phone number.
- Scroll down to the Messaging section at the bottom of the page.
- In the A MESSAGE COMES IN field, select Webhook and enter the following URL:
https://go.cloudbridal.com/api/twilio

- In CloudBridal, navigate to the Twilio Settings at this link.
- Enter your Account SID, Auth Token, and Phone Number from step 1 and Save.
- Test the integration by sending a test SMS message from a CloudBridal prospect/customer record. You should also try replying to the SMS message from your phone and validate that it is received in CloudBridal.
Additional Regulatory Requirements
Depending on your region, you may have additional regulatory requirements which require you to provide additional information to Twilio during the onboarding process.
-
United States: A2P (Application to Person) 10DLC (10 digit long code) standard. After registering a phone number in Twilio, you will need to navigate to Messaging > Regulatory Compliance > Onboarding in the Twilio dashboard to begin the registration process. Read more about this here.
-
United Kingdom: Requires business identification which can be provided to Twilio in Phone Numbers > Regulatory Compliance > Bundles and create a regulatory bundle for your Twilio UK phone number. Read more about this here.
-
Australia: Requires business identification which can be provided to Twilio in Phone Numbers > Regulatory Compliance > Bundles and create a regulatory bundle for your Twilio UK phone number. Read more about this here.
-
Other Regions: Refer to your specific region's guidelines here.
Vonage Setup - United Kingdom Only
If you are based in the United Kingdom, you also have the option of using the Vonage integration instead of Twilio. To set up Vonage, follow these steps:
-
Register for a Vonage account (formerly Nexmo).
-
Go into the API Settings page and copy your API Key and API Secret. You will need these later.
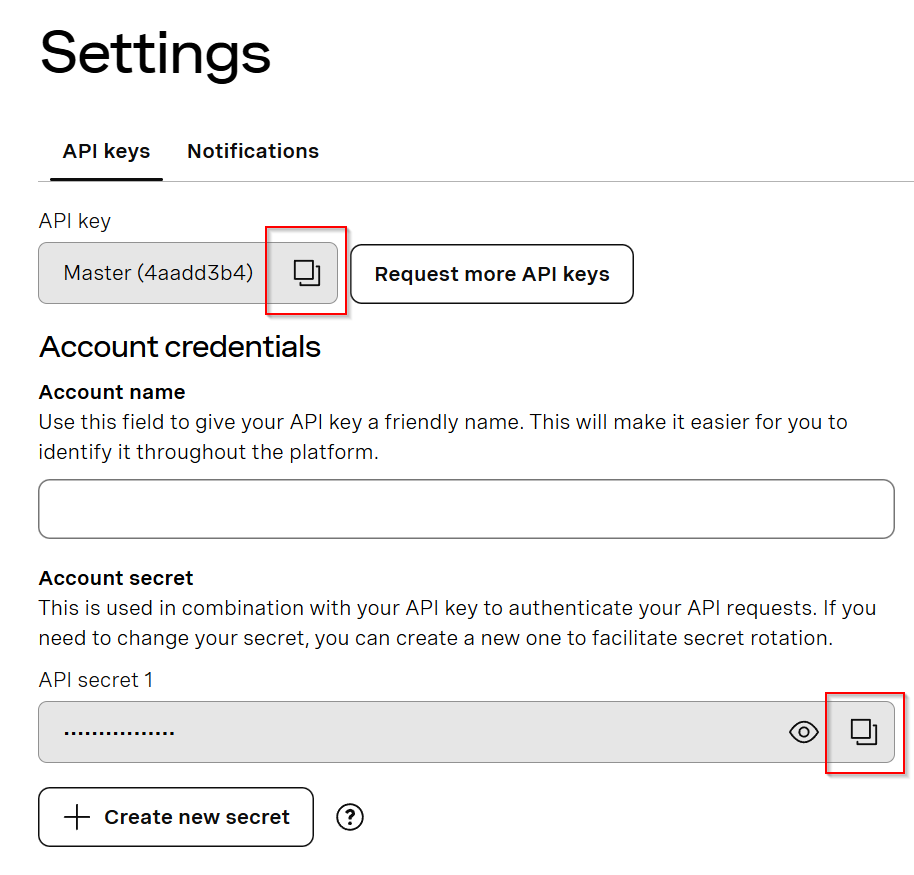
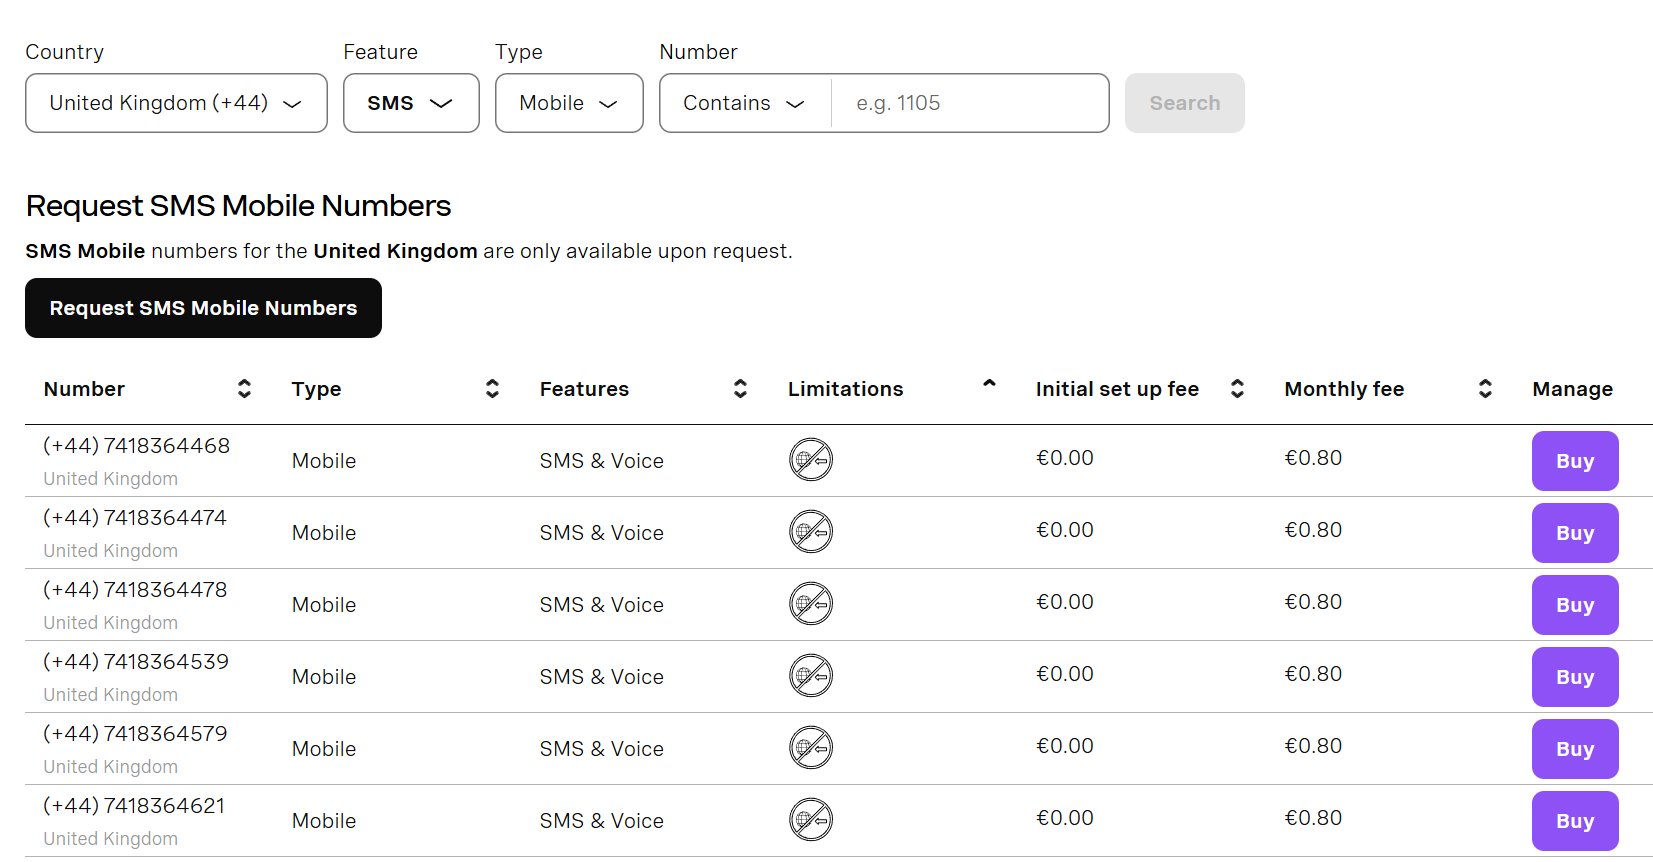
- Navigate to the Buy Numbers page and purchase a number. You may first need to fund your account before they will allow you to purchase a number.
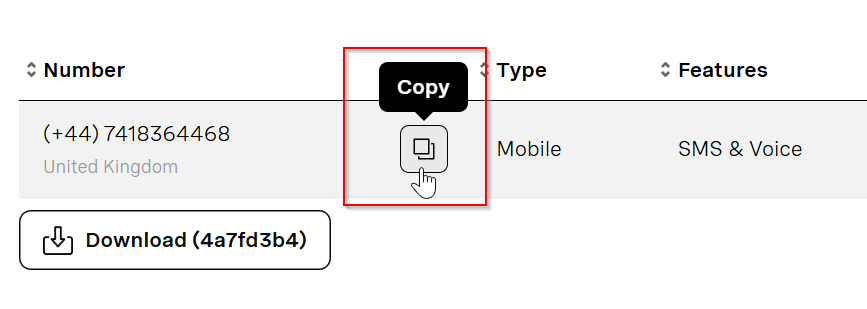
- Navigate to the Your Numbers page, where you will see the number you purchased. Copy the number into the same place along with your API Key and API Secret from before.
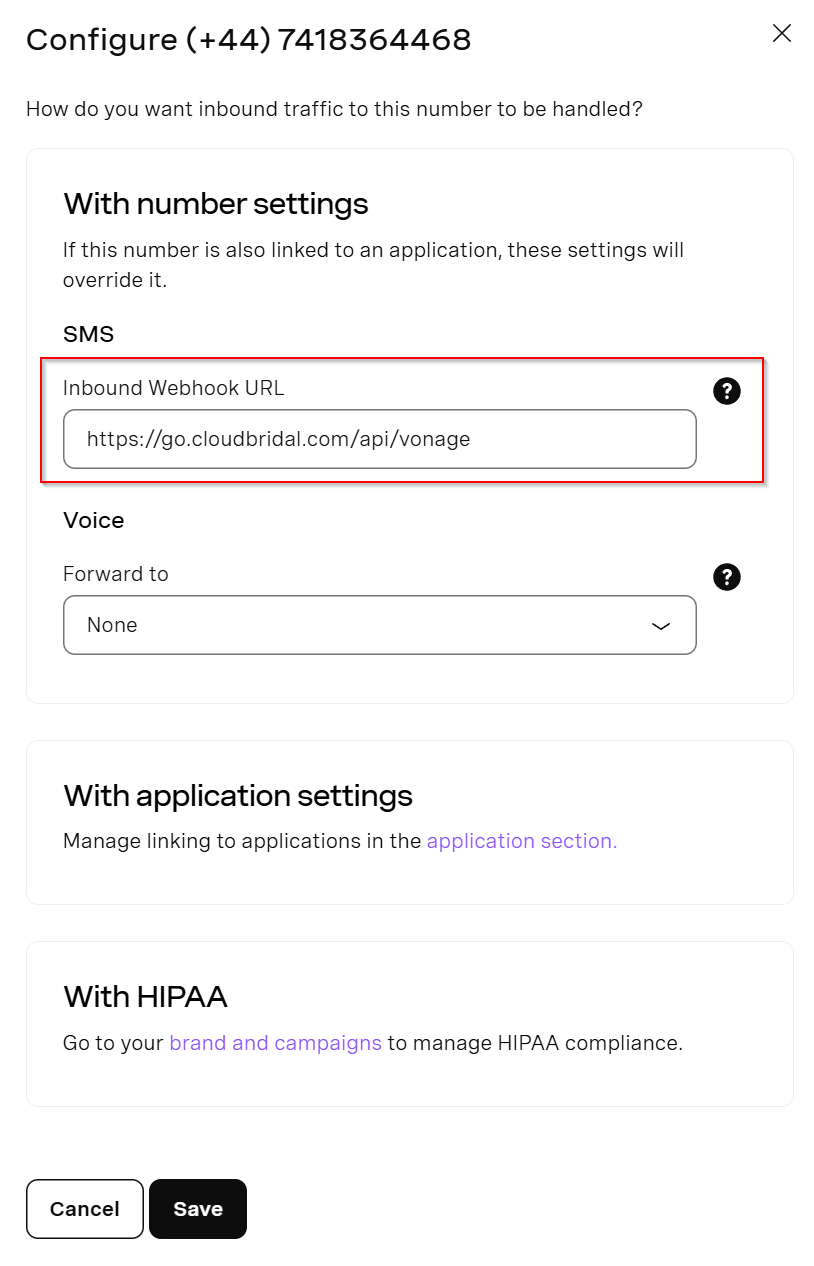
- Click the pencil icon to edit the phone number number, and in the Inbound Webhook URL field, enter enter the following URL:
https://go.cloudbridal.com/api/vonage
-
In CloudBridal, navigate to the SMS Settings at this link.
-
Make sure you select Enable Custom Twilio/Vonage Integration, and then select Vonage as the SMS Provider.
-
Enter your API Key, API Secret, and Phone Number from earlier. Then save your settings.

- Test the integration by sending a test SMS message from a CloudBridal prospect/customer record. You should also try replying to the SMS message from your phone and validate that it is received in CloudBridal.
FAQs
Does CloudBridal support receiving images (MMS)?
Yes, as long as you're using the Twilio integration, you can receive images from customers in an SMS message. The Vonage integration does not support images at this time. To configure images in Twilio, you just need to ensure that you have followed these steps:
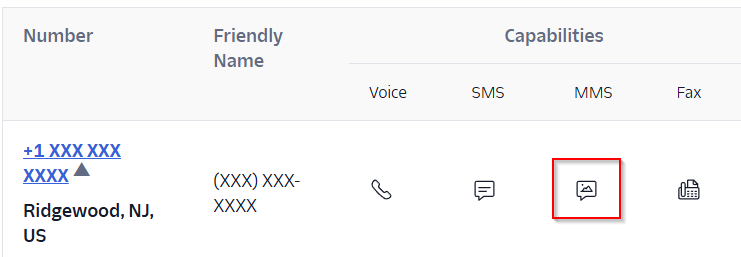
- Make sure you've purchased a number from Twilio that has MMS capabilities.
- In Twilio > Messaging > Settings > General, you must disable the HTTP Basic Authentication for media access setting. Note that this does not mean your images are publically accessible, only that they are accessible using the unique URL provided by Twilio, which CloudBridal needs to display in your browser.

